10 posts / 0 new
Last post
Endstufe
Endstufe's picture
Member
Offline
Last seen: 12 years 5 months ago
Joined: 02/12/2014 - 01:56
Karma: 53
[WIP] Dirty Muriel's Cornerclub

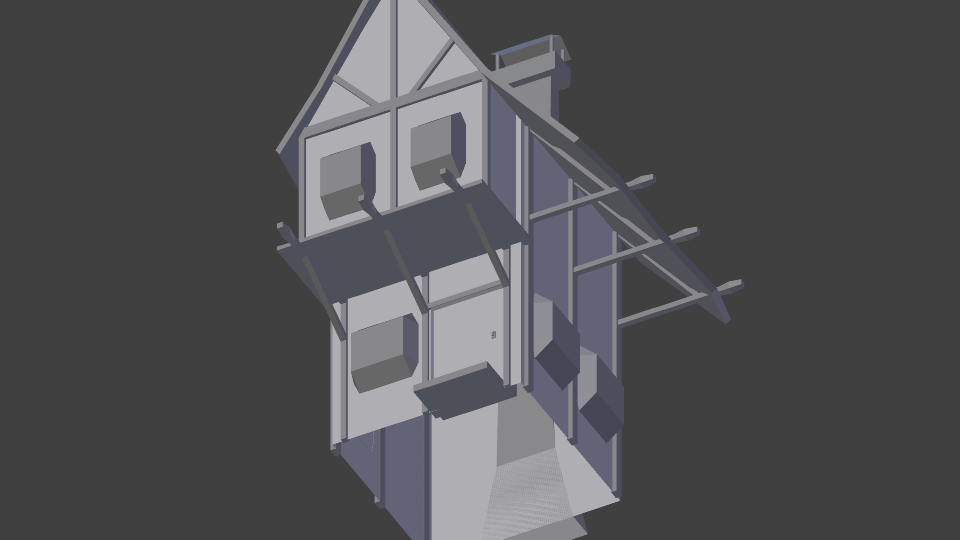
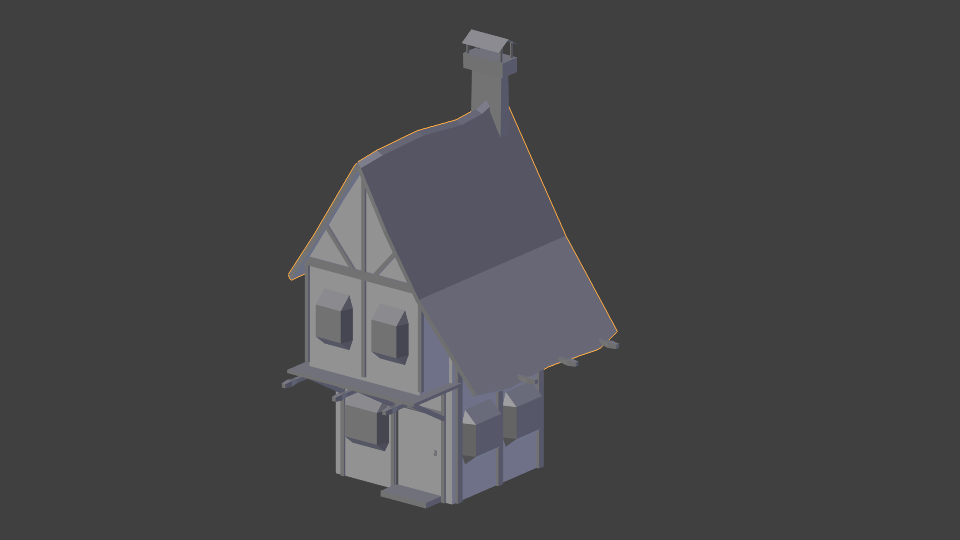
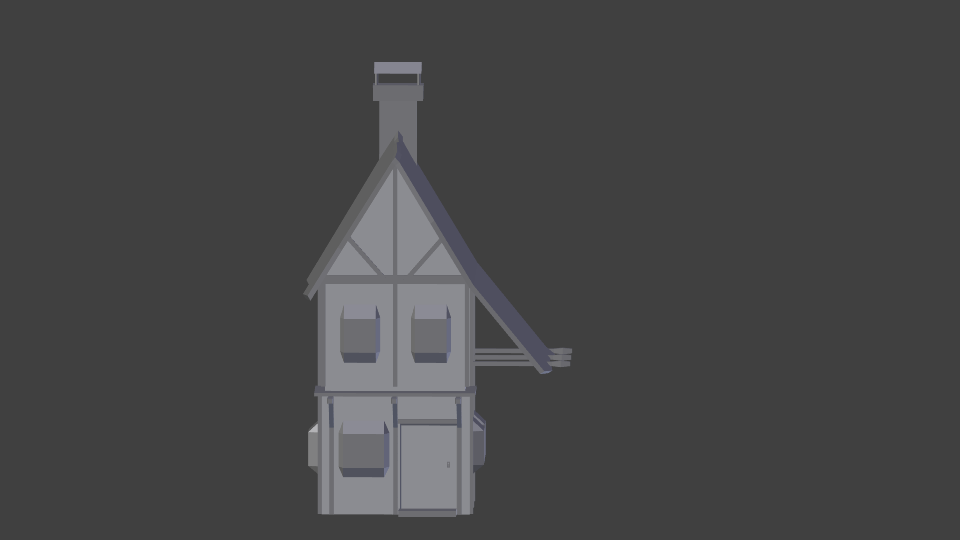
I startet working on a "single standing" house in Vvardenfell, near Sadrith Mora, next to Wolverine Hall.

http://www.uesp.net/wiki/Morrowind:Dirty_Muriel%27s_Cornerclub

As I'm new and this is my first model, please feel free to give me any feedback! It's highly appreciated!

I attached images of it. I tried to keep it as simple as possible and sticked to the original very much.
The model is not done, yet. There are details missing, but I think you get the idea and can direct me in another direction (regarding complexity, general structure, etc.).

I'm gladly sharing the .obj file, too. Program is Blender 2.5.

This is primarly done to get me into the process and get familiar with the whole modeling/structuring/implementing process.

Thanks.

---------------------------------------

Edit: Actually I got a question: How to proceed with texturing? I need to isolate different areas of the house, seperate the beams and the roof, etc. I', looking for tutorials, but haven't found a decent one yet.
AttachmentSize
Image icon house_3.png42.04 KB
Image icon house_1.png24.98 KB
Image icon house_2.png13.74 KB
Edited by: grumpycat on 03/14/2014 - 17:22
Silvermodder
Silvermodder's picture
Member
Offline
Last seen: 12 years 1 month ago
Joined: 08/19/2012 - 03:35
Karma: 103
yes if you separate parts it

yes if you separate parts it will be easier later to do the texturing in nifskope so dont join pieces that have different materials.

 i think that building is already done or at least a quite similar one that can be converted into the cornerclub 

jk
jk's picture
Contributor
Offline
Last seen: 10 years 11 months ago
Joined: 02/17/2013 - 12:30
Karma: 242
Hey Endstufe, good to see

Hey Endstufe, good to see more Blender users here!

Regarding the model, it is a very nice start, the only suggestions I have so far regarding the model are that later when you feel you got the base geometry of it right, roughen it up, just like in the example posted by Silvermodder. Notice that some of the wood beams are not perfectly straight and have some irregularities in shape. Minor details like these make a big difference when they are placed well. I'd suggest doing the same to other details of the house, including the walls and windows. See how an otherwise plain building gets a lot of character when the shape symmetry is a bit distorted: https://upload.wikimedia.org/wikipedia/commons/8/8b/Ye_Olde_...

Endstufe
Endstufe's picture
Member
Offline
Last seen: 12 years 5 months ago
Joined: 02/12/2014 - 01:56
Karma: 53
Wow, that looks awesome!

Wow, that looks awesome! Seems like I got something to do to achieve these results.

Anyway, I think I'm making my way through, since I need to start somewhere.

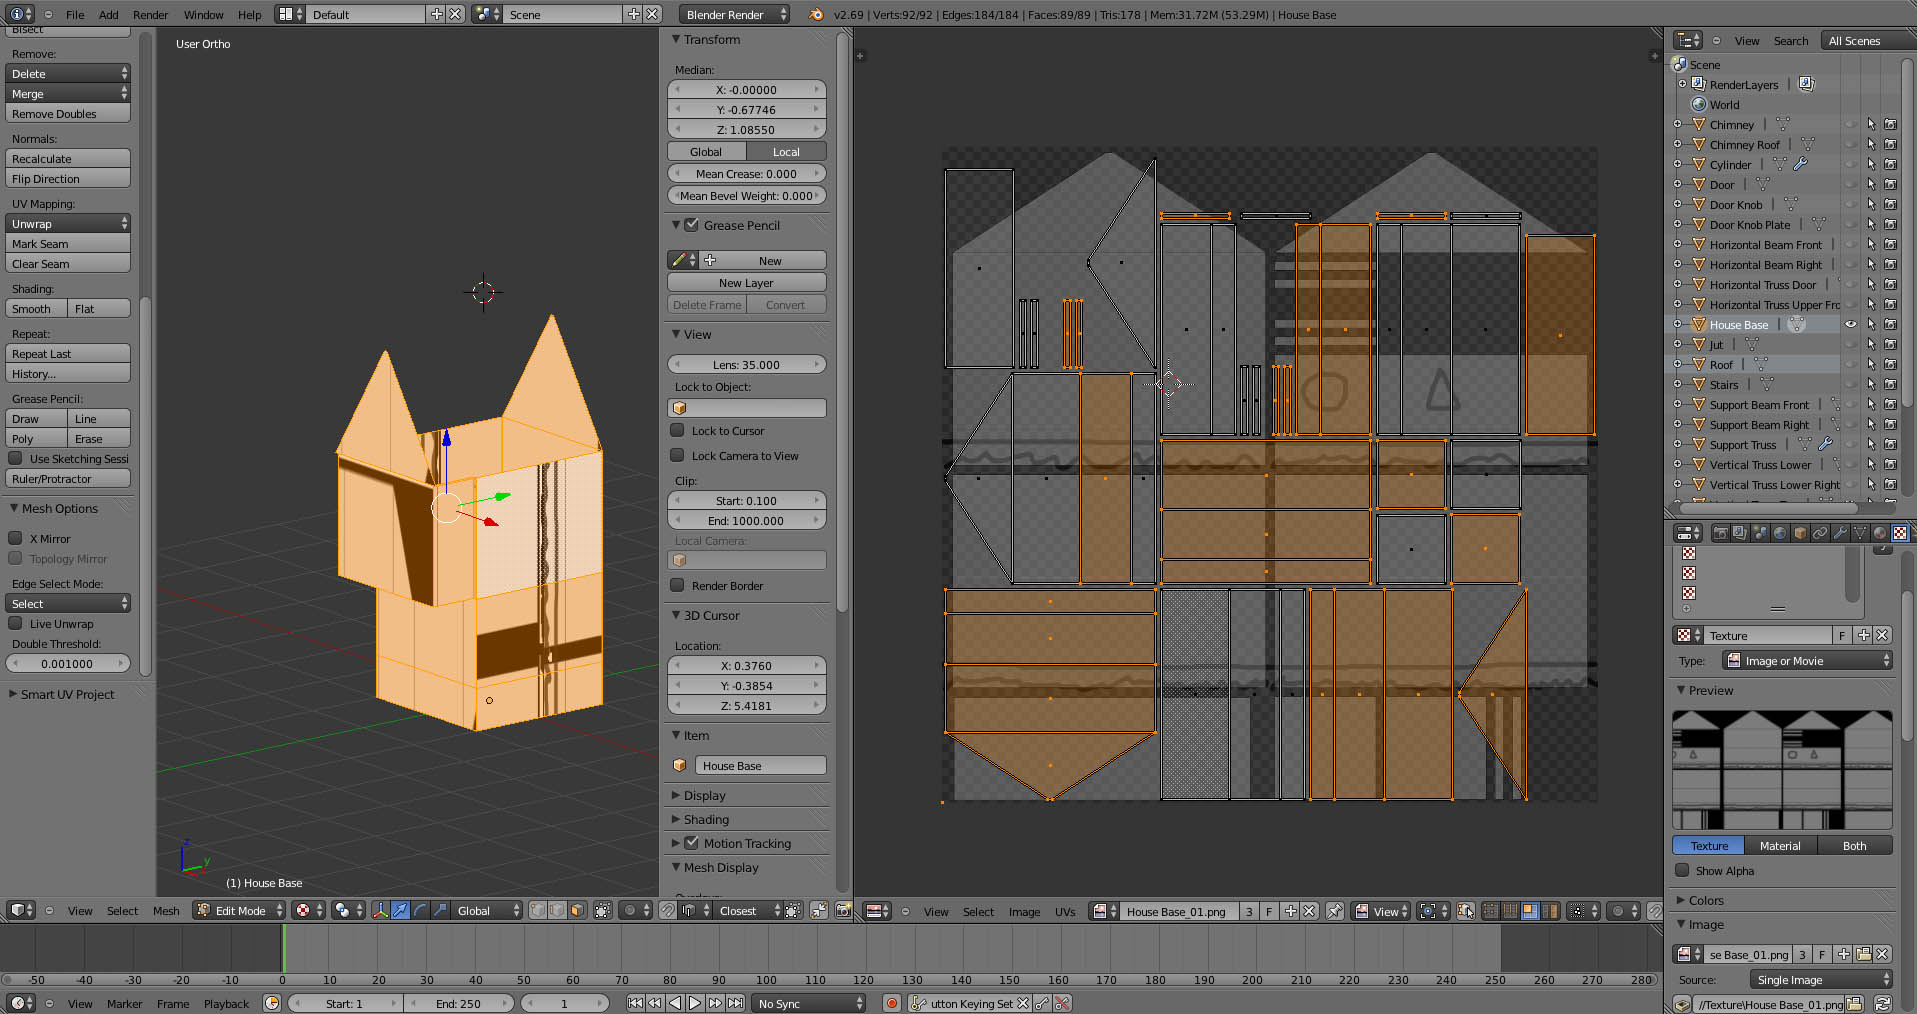
I actually started to try some texturing, but got stuck at the very first UV unwrap. The screenshot looks confusing, I know, but I got a "simple" issue: The Map is distorted or scaled in bad manner, whatever. As one can see the triangle of the roof is crunched. This leads to very unpleasing results later on.

Someone got any help about his issue?

AttachmentSize
Image icon problem.jpg281.68 KB
jk
jk's picture
Contributor
Offline
Last seen: 10 years 11 months ago
Joined: 02/17/2013 - 12:30
Karma: 242
Did you use the auto

Did you use the auto unwrapper? It generally produces poor results, I'd suggest you unwrap the model manually. Also, if you ever scaled the model in object mode in +Z direction, the UV coordinates will be distorted. To avoid that, select the model in object mode and then Ctrl+A -> Rotation and Scale.

Endstufe
Endstufe's picture
Member
Offline
Last seen: 12 years 5 months ago
Joined: 02/12/2014 - 01:56
Karma: 53
There u go, the last tip

There u go, the last tip helped very much. I was actually looking for a "normalize scales" option :) Thank you very much :)

Smerk
Smerk's picture
Member
Offline
Last seen: 10 years 4 days ago
Joined: 12/11/2012 - 18:00
Karma: 344
Awesome! The blender commune

Awesome! The blender commune grows. :)

Endstufe
Endstufe's picture
Member
Offline
Last seen: 12 years 5 months ago
Joined: 02/12/2014 - 01:56
Karma: 53
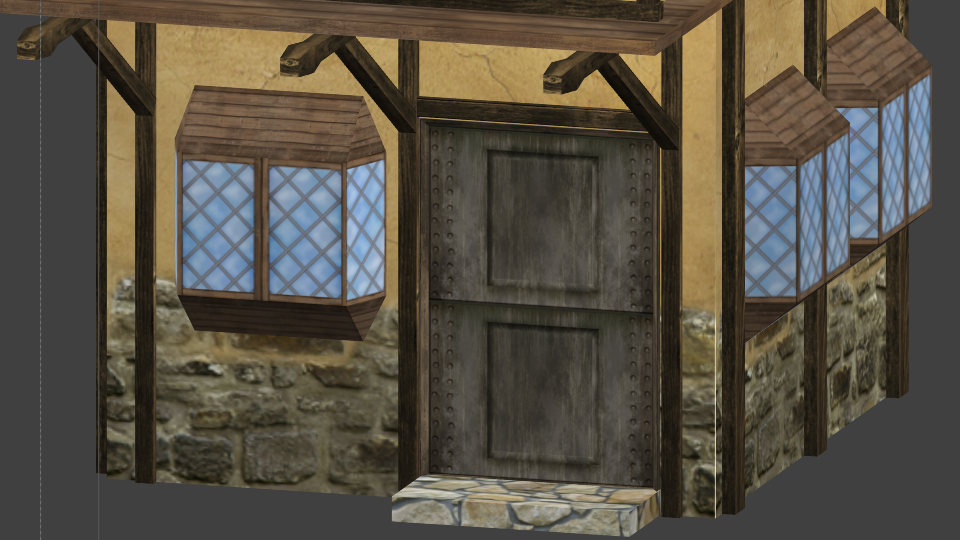
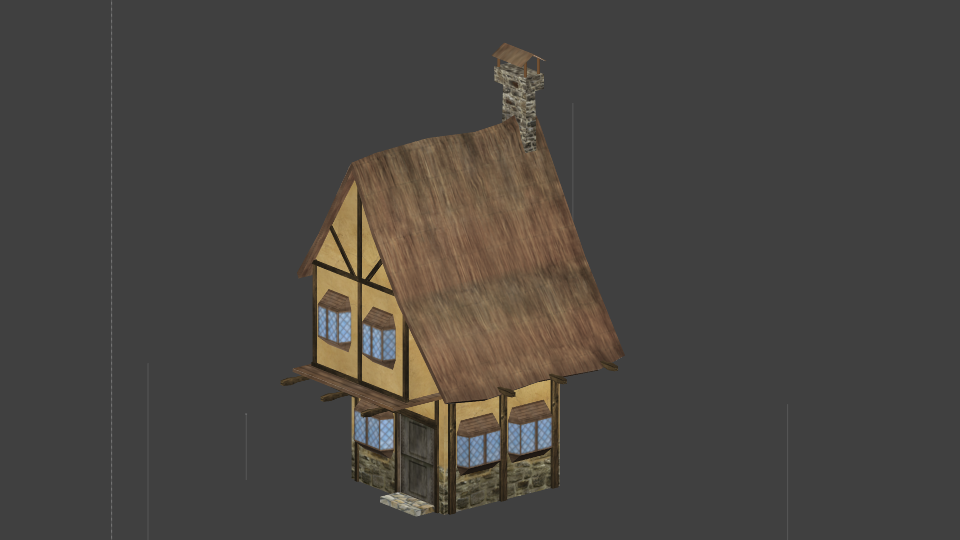
Update on my progress.

Update on my progress.

Actually I don't know if I'm doing things right, because the render preview sucks, but in texture mode the house looks somewhat like a house.

Texturing took longer than expected. Plus: I used a modifier called array to decrease polycount. Has anyone some numbers on how big the count should/can be on a building like this? I currently have 915 verts, 663 faces and 1553 Tris. Is that too much/less?

I messed the resolution of the mud texture of the house up, but anyways ;)

AttachmentSize
Image icon house4.png186.06 KB
Image icon house5.png631.78 KB
File house.rar447.27 KB
LASentry
LASentry's picture
Member
Offline
Last seen: 9 years 9 months ago
Joined: 01/03/2013 - 19:29
Karma: 1656
Donor
From face value to poly-count

From face value to poly-count looks too low in some places, e.g. the Windows but maybe once they have some nice textures they'll look fine.

dwiseman57
dwiseman57's picture
Offline
Last seen: 10 years 8 months ago
Joined: 01/09/2016 - 14:01
Karma: 0
Hey I would love to try and

Hey I would love to try and 3D print this! Is the model available perhaps?