[MIA] Stonewall

Submitted by jdsmall25 on

So HappyChappy tasked me with creating the stonewall kit and I spent a good while reading these forums and researching as much as I could about creating "kits."  I stumbled on a good article by the Bethesda team member Joel Burgess.  I was starting to get more comfortable with the idea so I finally started modeling the stonewall.

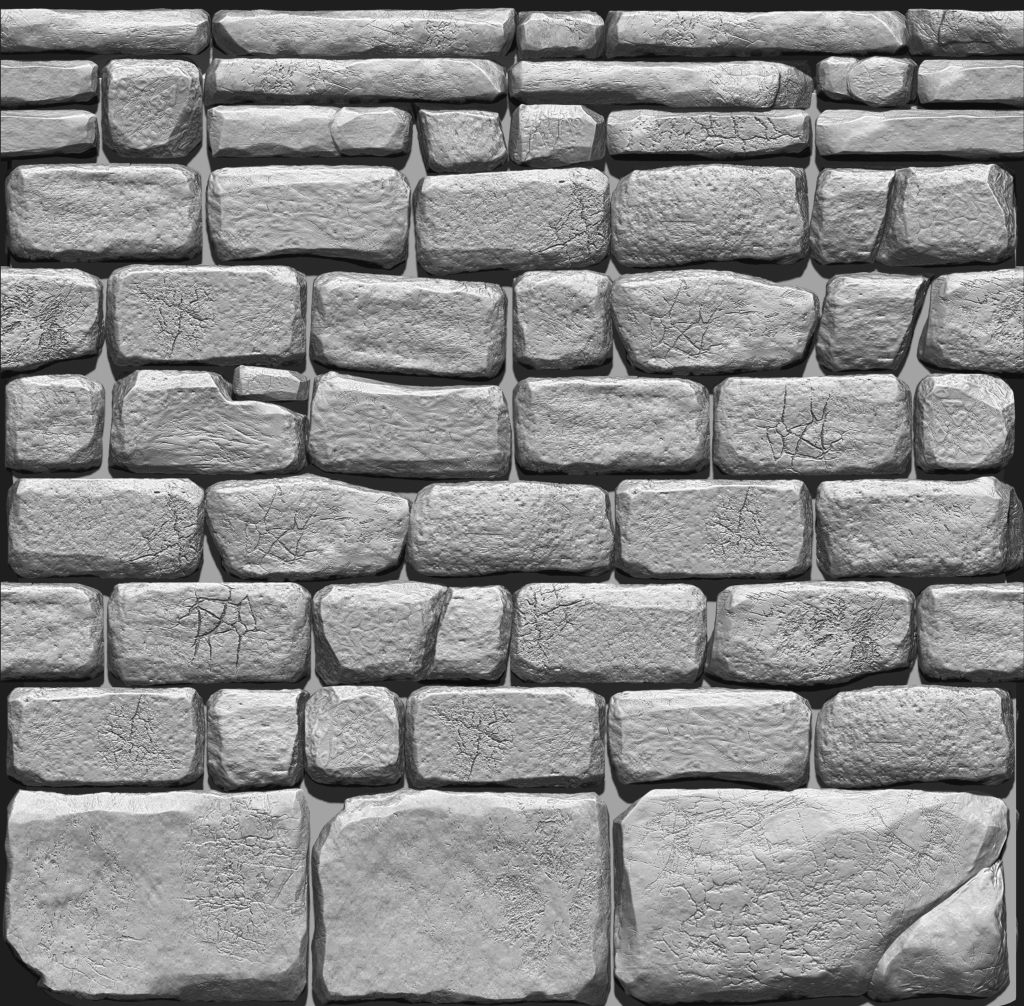
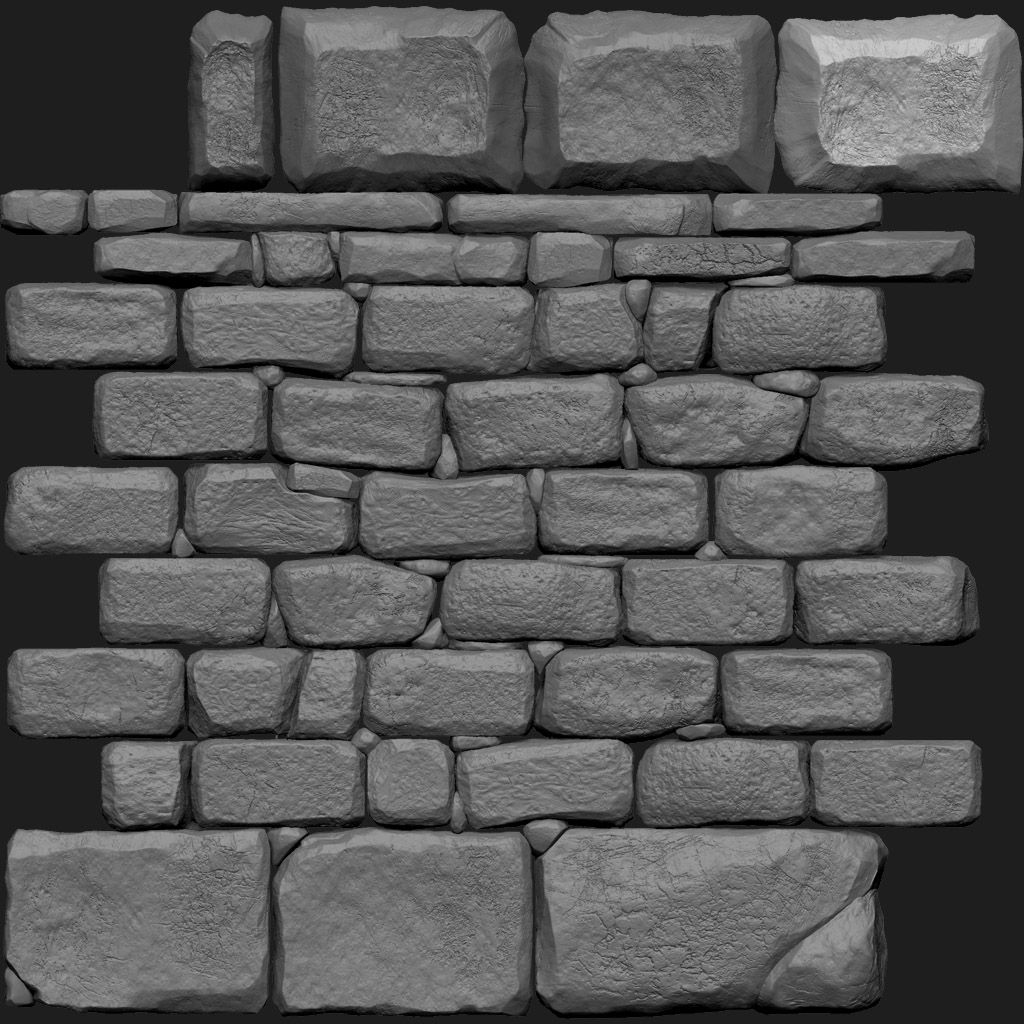
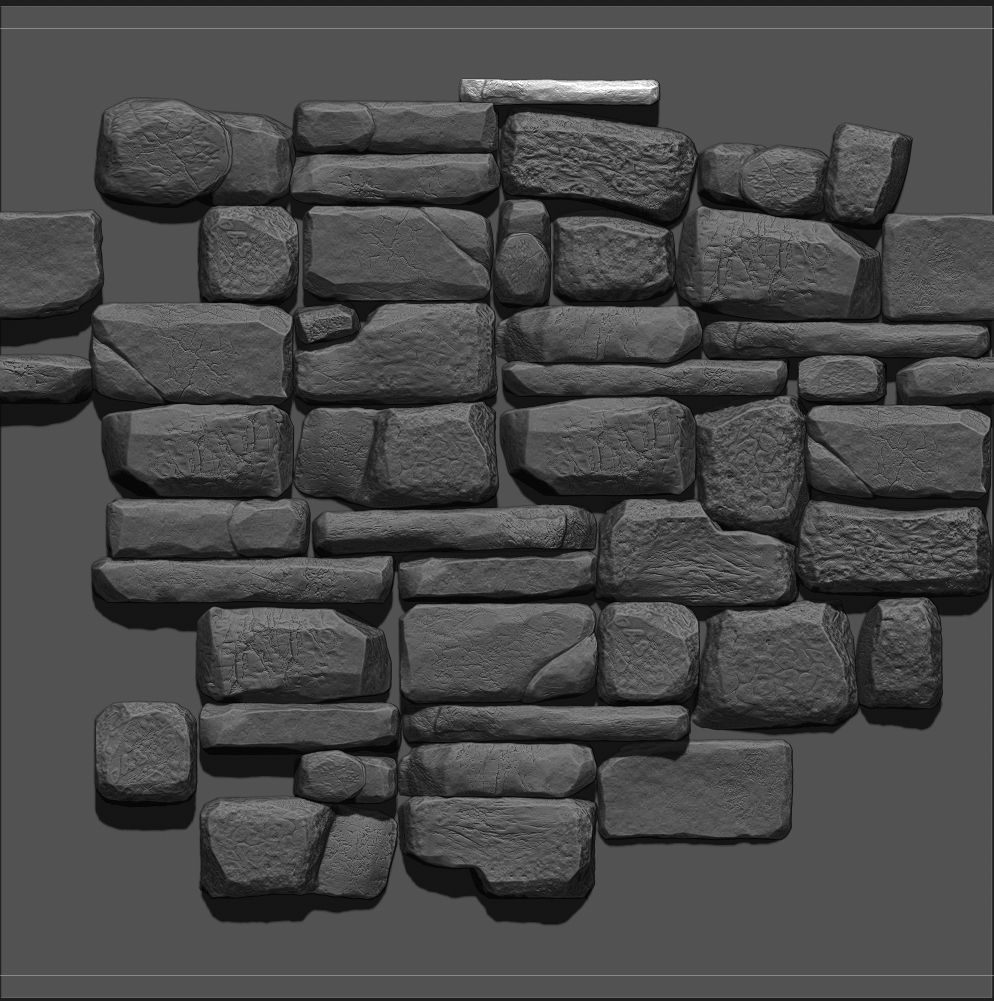
I've been working on creating the initial texture as well as base portion of the wall while following the Pixologic tutorial by Tate Mosesian.  The tutorial is good but its clearly left out some detail because Tate repeatedly uses assets he's pre-made without detailing how he made them.  That aside, my idea was to create the tile-able texture that can be used for all parts of the kit as well as getting a general idea how I wanted to model the wall itself.  This is what I have so far without any color as I was simply exploring different ideas for the way I wanted it to look.  So far I'm pretty happy with the results. I'm shooting for a rough cut stone wall that is slightly aged.

Does anyone have any critiques for me so far and additinally does anyone have other techinques for creating kits that they could share with me?
 

Karma: 2 (2 votes)
Last edited by grumpycat on 8 Dec 2014 - 19:16.

Great article by Joel Burgess. I'm going to post this to all Level Designers and Model making to get an idea of why Morrowind models are what they are, and possible approaches we can do.

As far as the stone wall, there are only 4 pieces to the tileset, so its not something that you have to concern yourself with too much. It would be nice to have an alternative wall model to mix it up like a broken stonewall. One that has half the wall fallen down and add the rubble.

I'll use the Skyrim version to give an example:

As far as the texture goes I'd make sure you have more stones overlapping rather the flush with each other, as this tends to fall apart in real life. I brick and mortared a stair case and foot path, so aware of structural integrity.

Karma: 0 (0 votes)

Here's an update.  I'm going to start building out the low poly now.  Only slight addition will be to add a decoration to the top to give it a better silhouette. Then I'll start making the rest of the kit.  Let me know what you guys think.

Karma: 2 (2 votes)

Got my thumbs up. I would say literally, but you know its virtually.

Karma: 0 (0 votes)

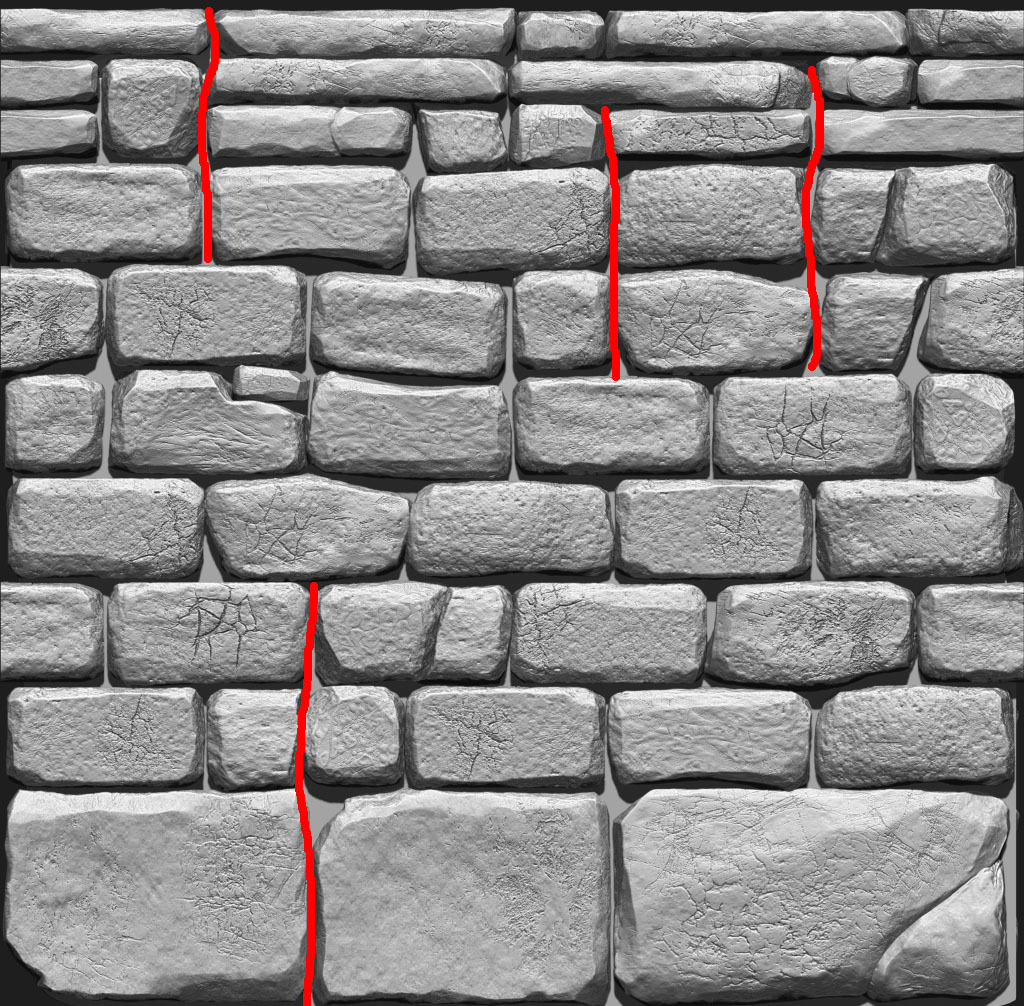
Isn't this weakspots in the wall (Outlined in red)? I just wouldn't think that anyone who was building a wall would make those weakspots in the real world atleast.. But the rest looks very good :)


Karma: 0 (0 votes)

I would also fill the gaps between the stones with very little ones.

You would want to do that because they are waste products when crashing/spalling the stones to those brick kinda forms instead of getting turf for it. It's just more economic.

Also: I'm not sure if turf (or a smiliar product) would be available everywhere in Vvardenfell. Around Seyda or generally in the south it would be more plausible to gather it, but Azura's Coast e. g. is more sandy imo.

Karma: -1 (1 votes)

Thanks so much for the feedback guys.

Endstufe I'll work in your suggestions hopefully this evening.

Winsur I think I accidentally put way too much value in randomness than construction. Thanks for pointing out the weak spots.

Karma: 0 (0 votes)

That looks nice so far. I post some references of masonry here to help you out.

Also it would be really nice if stone walls in different regions were different or at least had different tones to match the area's colour scheme.

http://imgur.com/7EZSFAS

http://imgur.com/DJpzbhc

http://imgur.com/0yIvLpJ

http://imgur.com/VlJYhJD

http://imgur.com/JwuZtU5

http://imgur.com/LOGVj8v

http://imgur.com/ErE8ftB

http://imgur.com/Aw2qKn5

http://imgur.com/cAMuKY5

Karma: 0 (0 votes)

I think just 6 and 7 really fit here. The other examples are made too fine. Especially the little villages/towns would have used waste material of their houses to build the walls. This may not go for richer inhabitants of course.

But I'm with you about the different kinds of walls. Azura's Coast will have red waste materials for the walls (eventually).

Karma: 0 (0 votes)

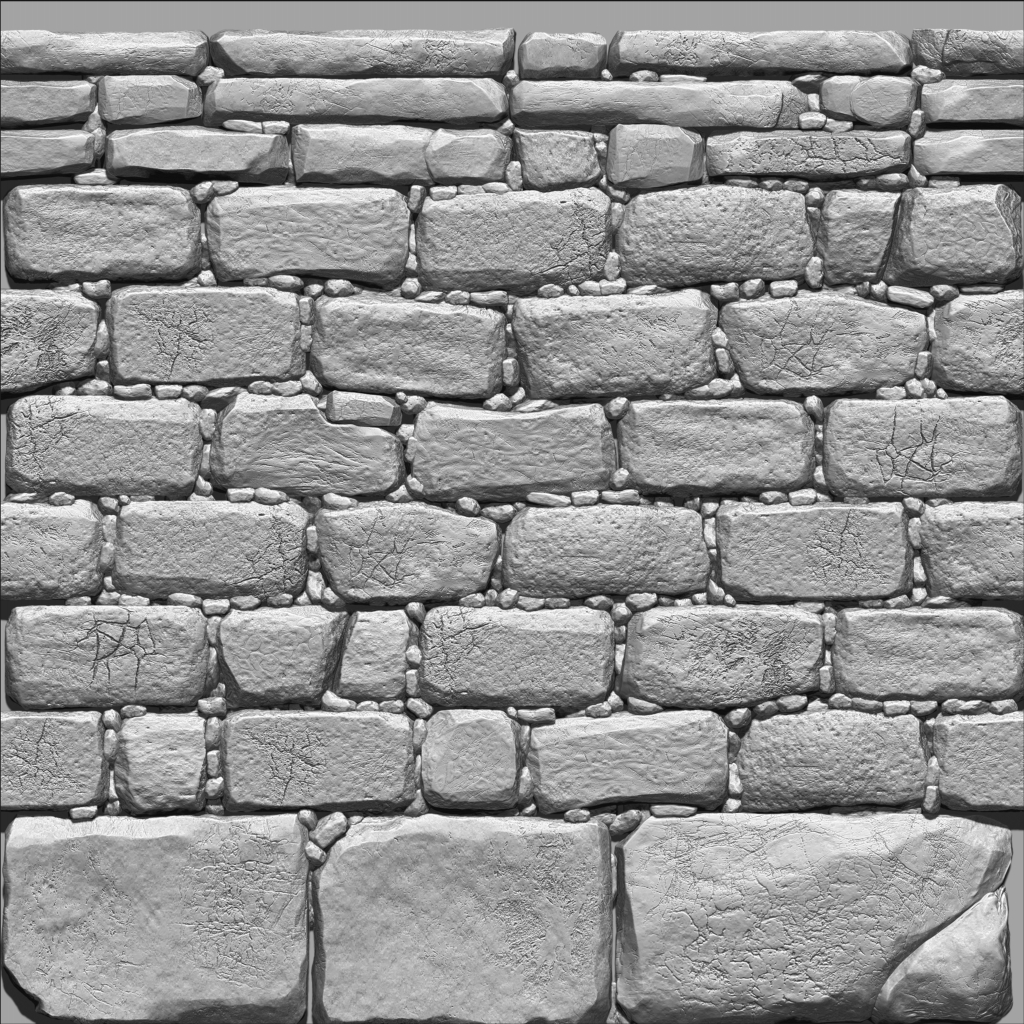
I've been pegged at work so didn't have a ton of time but here's a quick update. I've taken out the weak spots and started adding some filler in between the stones.  Is this any better? My last obstacle is to make it tile-able horizontally, as it stands it isn't.

Karma: 4 (4 votes)

I hate to be that guy, but you missed one weak spot. At the top near the middle. I'd just connect the two long, thin stones into one longer, thin stone. Other than that, great job!

Karma: -1 (1 votes)

what are you using for the scuplting?

This is a good tutorial for zbrush.

http://www.youtube.com/watch?v=rNgs2DcAsF4

Karma: 0 (0 votes)

Me likes the fillers :) Very rough and unchisel, nice :>

Karma: 0 (0 votes)

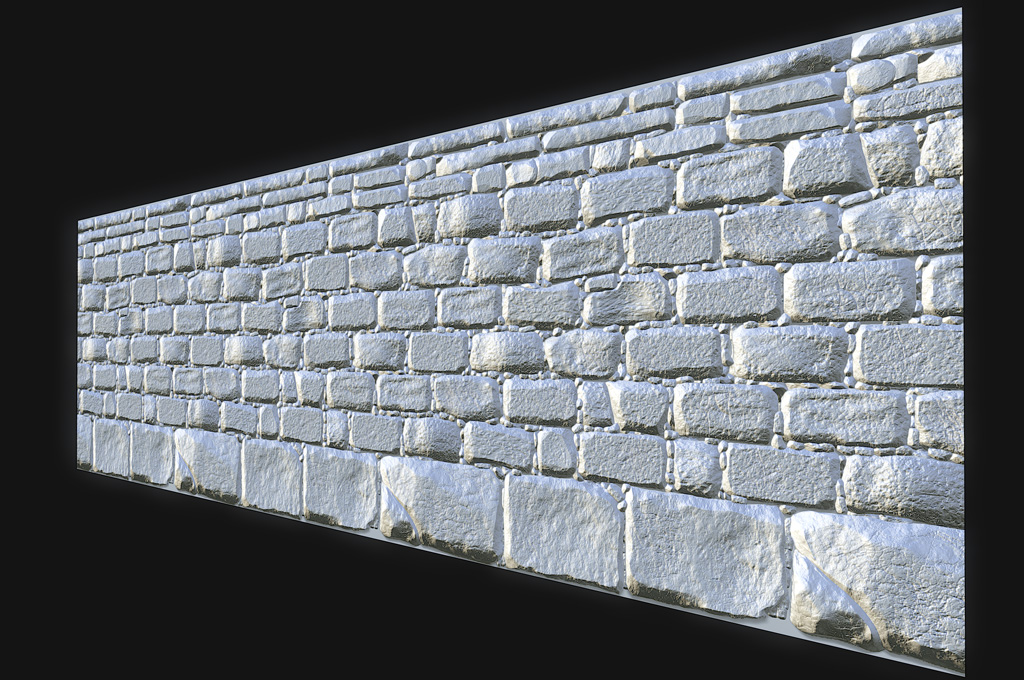
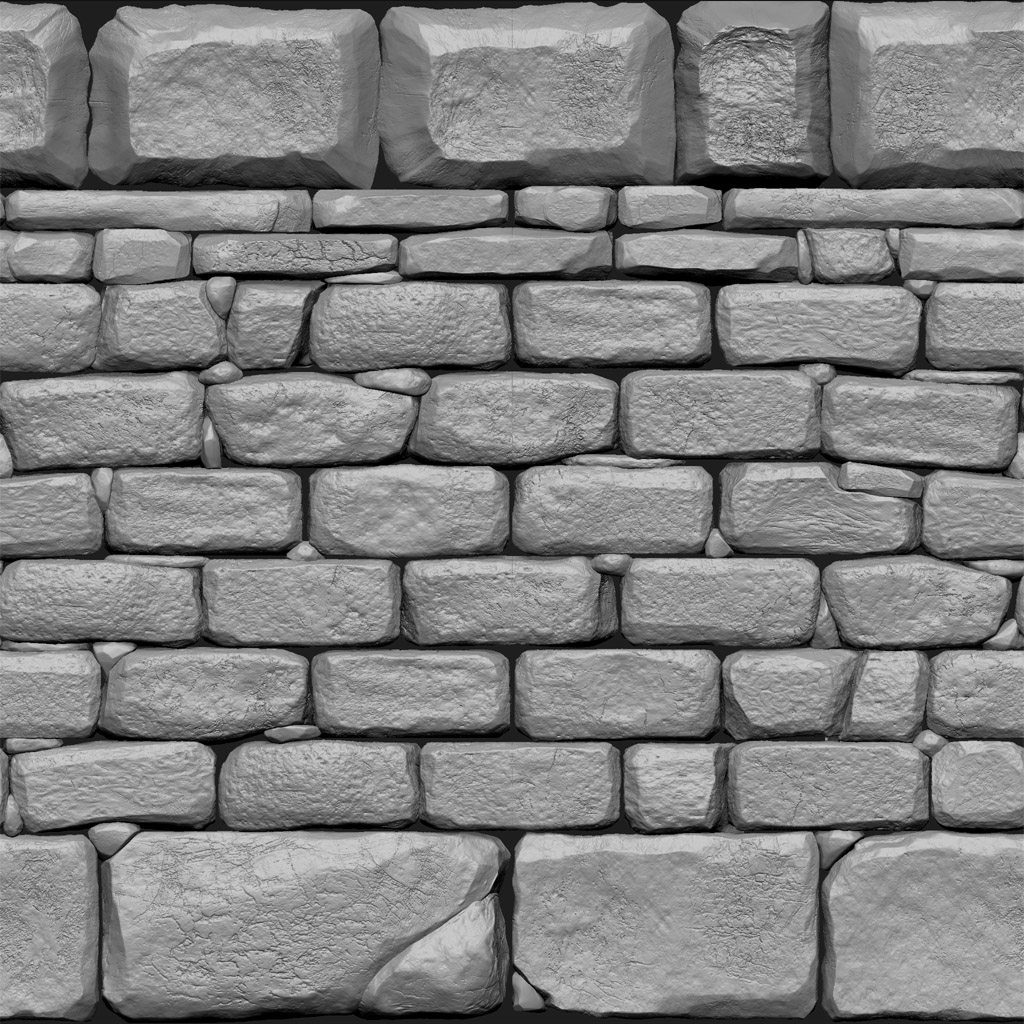
Update: I got it to tile properly and I did a quick normals test in marmoset using just a plane to see how she looks.  I will hopefully have this finished before the week is over.

Karma: 0 (0 votes)

The wall is looking pretty good.  I just have a bit of criticism that will hopefully be 'constructive'.

Walls do not generally have tiny circular pebbles between the stones like that, especially if they're grouted.  It may have some thin, wide rocks to make up gaps between rocks that don't quite measure up to their neighbors - but even these are used sparingly as most of the stones should be uniform in a strong wall.  The way you have used them here, they aren't filling gaps, so there is no functional purpose to them.  There are a couple of pictures that VileGecko posted that would be good for inspiration, and here's another that seems to match the color and construction of the Imperial walls in Morrowind (though with more thickness, like the blocks you have in your current model).  You can see where a few smaller rocks are used in gap-filling.


Stone Wall[External image]

Also, Twisted's criticism of the top portions having structural weakness is just as valid as Wisur's was before. It may not matter as much further down the wall, but the very top is what endures the most weathering damage over time, and is made of the lightest and easiest to 'loosen' stones - so for now the top portion looks at risk of collapsing.

The clean break that you have on the bottom rock is great - this is how strong stones fracture and it does not look out of place to have these appear infrequently as they are now.  Yet, and I'm not sure if it's supposed to be fracturing or just for a rough hewn texture, in the picture you posted on the 24th some of the stones look like they have 'chicken egg' fracturing patterns that look out of place in a wall built of materials suited for fortification.  I can't see enough detail in the last picture to tell if it's still there or not.

Karma: 0 (2 votes)

Thanks for the feedback Smitehammer!  I never shy away from a critique however it will be difficult to please everyone.

Walls do not generally have tiny circular pebbles between the stones like that

I added those in from Endstufe's suggestion.  This is an easy fix by either just stacking the stones closer together or replacing them with a mortar of sorts.  However not sure what kind of mortar would be available for the time, if at all?

the top portion looks at risk of collapsing

What do you propose that I do? Just carry the large stones all the way up? Or make the thinner stones longer to make them seem heavier? I made the stones thinner based purely on style so there is 3 distinct sections of wall, large, medium, and small stones.  I was thinking of adding another stone layer on top to like this to give it more texture and silhouette

 [External image]

the stones look like they have 'chicken egg' fracturing patterns that look out of place in a wall built of materials suited for fortification

Good point. This is another easy fix.  I was just trying to add some surface detail variation.

Karma: 0 (0 votes)

I think having the stones on top being long and thin is fine!  I actually like the way you have the larger stones as a 'base', then medium and finally the thinner stones (which might not be able to bear as much weight as the thicker lower stones anyway).  Just have them 'overlap' with the stones below them so there's no 3-stone deep 'fault line' weaknesses.  Again, this isn't quite as important to account for further down in the wall, as it will have pressure on all sides keeping it from causing great weakness.  At the top, however, there's nothing to keep all 2 or 3 of the 'directly stacked' bricks from falling as one large 'chunk'.

I think adding smaller gap-stones would still be fine, just have them filling in noticeable gaps in the stones, where the stones wouldn't quite fit without them - like the picture you just posted.

Karma: 0 (2 votes)

Smite, as I pointed out, those fillers will be waste material of building houses and will be used because they enhance the walls strength and  decrease the amount of mud/turf needed, which is harder to get than using waste material that already exists.

We are not talking about today's walls, we're talking about middle-age kinda walls that had to be built cheap. That's why they won't have the quality of house walls where the good stones were used.

Karma: 0 (0 votes)

Building on the cheap doesn't mean building shoddily.  Lots of examples of ancient walls, none of which throw little rocks as 'filler' except where there are gaps to fill.


Ancient Celtic Stone Base[External image]

Ancient Celtic Dry-Stone (No Mortar) Retaining Wall[External image]

Machu Picchu[External image]

Wailing Wall[External image]

Great Wall of China[External image]


Karma: 0 (2 votes)

As for the material for the mortar, it seems the abundant volcanic ash along with waste from the imported 'limestone' used in Imperial construction would be perfect.

"The Romans made concrete by mixing lime and volcanic rock. For underwater structures, lime and volcanic ash were mixed to form mortar, and this mortar and volcanic tuff were packed into wooden forms. The seawater instantly triggered a hot chemical reaction. The lime was hydrated—incorporating water molecules into its structure—and reacted with the ash to cement the whole mixture together." (source)

Karma: 0 (2 votes)

Nice one on the material, but I think you're missing the point in my feedback: These aren't walls of building, they are sometimes "spread around the area" and most of the times they act like fences.

The reason we do not find many resources for this kind of walls is, that they were not built to be lasting a lifetime, while some of the buildings you showed clearly were.
Also one has to keep in mind that time has had its fingers on the walls, regarding mud/turf and also the outer little stones.

Best example is the walls you see for the very first time when leaving the ship in Seyda. They are roughly built, a bit damaged and worn. They are not taken care of that much. There is no reason to manufacture stones just for these walls and let waste lay aside. It is logical for two reasons to use them: Less material needed, better overall strength of the wall.

As I'm not giving -1 for constructive feedback (but love to do for non sense posts), it's not me "punishing" you for your opinion. Just wanted you to know that :) Conversations like these are highly productive.

I'm spoilering some images that show - in contrary - some examples of which I think suit our needs more:

Click here to expand or collapse this section

http://www.featurepics.com/FI/Thumb300/20090524/Ancient-Stone-Wall-Greece-1192435.jpg

One can notice some little stones here. It's also the kind of rough stone we are talking about, I think.

http://www.google.de/imgres?client=firefox-a&hs=c2d&sa=X&rls=org.mozilla%3Ade%3Aofficial&channel=sb&biw=1280&bih=885&tbm=isch&tbnid=2Gq3IW8f5obn0M%3A&imgrefurl=http%3A%2F%2Fwww.worldofstock.com%2Fstock-photos%2Fancient-stone-wall-texture-horizontal-sandstone-background%2FADT4666&docid=RPgl8KtR17Uc7M&imgurl=http%3A%2F%2Fwww.worldofstock.com%2Fslides%2FADT4666.jpg&w=500&h=332&ei=kssNU87uKMTOsgacy4HIDQ&zoom=1&iact=rc&dur=246&page=1&start=0&ndsp=25&ved=0CHsQrQMwDA

An example that underlines your point on "just where they are needed". BUT: The less space you have between the stones, the less mud is needed, the stronger the wall because adhesion is a far stronger force than cohesion in this case.


Karma: 1 (1 votes)

I guess the weak points are fine if it's just a fence wall. I thought this was meant to be a fort wall, and that would not be able to withstand any sort of strike from siege weaponry.

Karma: 0 (0 votes)

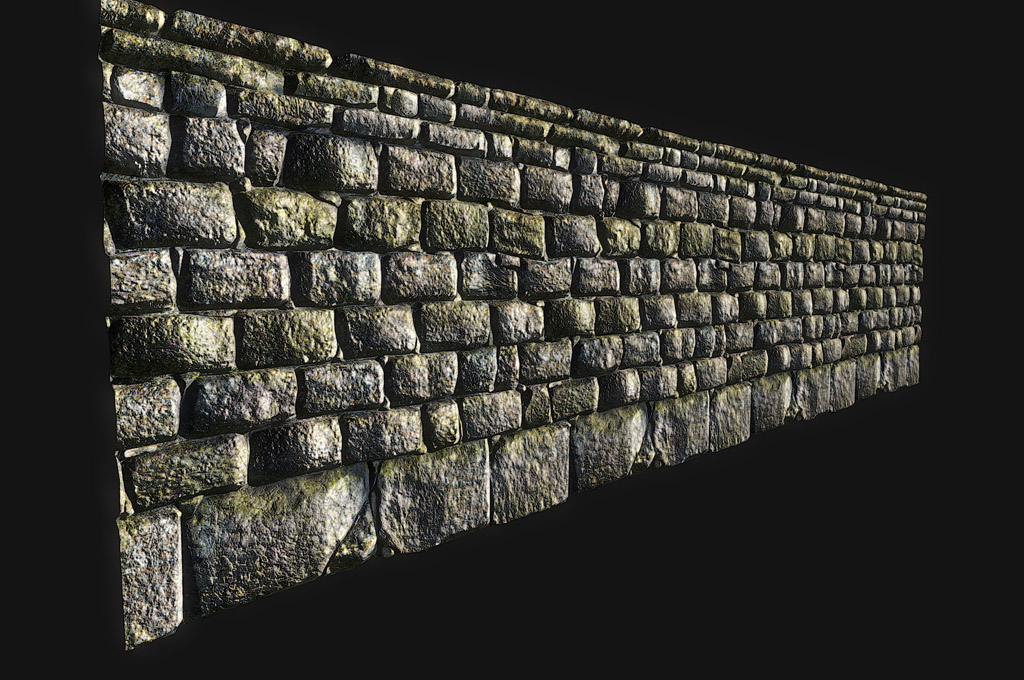
Hey Guys, been on quite a hiatus. Work has been kicking my ass and I was traveling around a bit but I'm finally back to business.  Here's an update with the low poly with the textures.  I've having a seam issue on the top where my texture doesn't loop. I'm just going to keep reworking the UVs till I find something that works but then again I don't know how much it matters.  Any feedback would be great. 

Karma: 3 (5 votes)

further to our public conversation, your sculpting is good, but add the top parts within the square texture.

The low poly is good but we need to make more organic and make a few versions.

Most important:
I tested your tiling texture and its broken, ie tile has error. Now this is zbrush's fault, and there is a fix for it.
I can show you how, but it may not matter for this, because you can ignore the outer edges and make the wall pieces slot into each other.

Karma: 0 (0 votes)

Rav is this kind of what you were suggesting?  Its a WIP but just seeing if I'm on the right track.  

Karma: 0 (0 votes)

Here's the tilable texture Rav.  I'll need to catch up with you tomorrow to go over the geo part of it. Thanks for your help again.

Karma: 0 (0 votes)